Finally, I will be able to share with you guys the first ever DIY I made for myself. I am really looking forward to do such things for the longest time and it was just now that I had the opportunity of doing so. The original plan I had was to create an ombre or dip dyed shorts but I was not able to find any jeans or old shorts to use, at the same time, I've been looking anywhere to find a dye for the shorts but it was not available nearby. So sad :(
If you guys don't know, I have emotional attachment to anything and everything I own unless I accepted the fact that those things no longer fits me (clothes/shoes) so I am really having a hard time to get those old things out of my closet or even give it to someone until I had a lot of niece which are almost the same height of me! Haha. so I'm not being bothered of any things that I will buy because I can easily hand it over to them or give them the clothes that are still in good condition.
Right, So what I have chosen was to DIY-ed an old blouse which I absolutely love because it was too comfy to wear, I usually wear it at home as "pambahay" or whenever I go somewhere near home. I thought about it a million times before I finally decided to change the usual blouse it used to be.
By the way, I got this blouse on an factory overrun bazaar for Php50 ($1 approx). There were two of them but this one was what I wore the most and thought it was too old already.
So here's what you need:
 |
| A shirt/top |
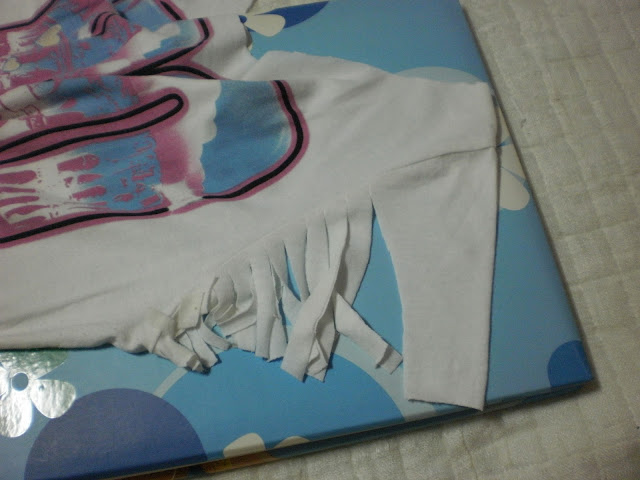
2. Cut the hemlines of the shirt (for both sides of the sleeves and the bottom part)
then this it how it should look like..
3. Starting at the sleeves, Cut it from the hem (before).
afterwards, make sure that you pull the one's you've cut a little bit so it will fall perfectly and won't look like you did it your own. :)
4. Do excatly the same on the bottom of the shirt/top on what you've done on the sleeves.
then the fifth and final step is..
Tadaaaaa! :)
Don't forget to wear your attitude and add some accessories on it. What I've added was the necklace I blogged about yesterday!
Hope you liked it! :)
xx Jen of TheFandabidoziDiary xx


cool DIY!
ReplyDeletehttp://deathbyplatforms.blogspot.com/
Hi dear! thanks for dropping by.. visited yours too and I absolutely love the contents. One sure follower here. :)
Delete